
After:


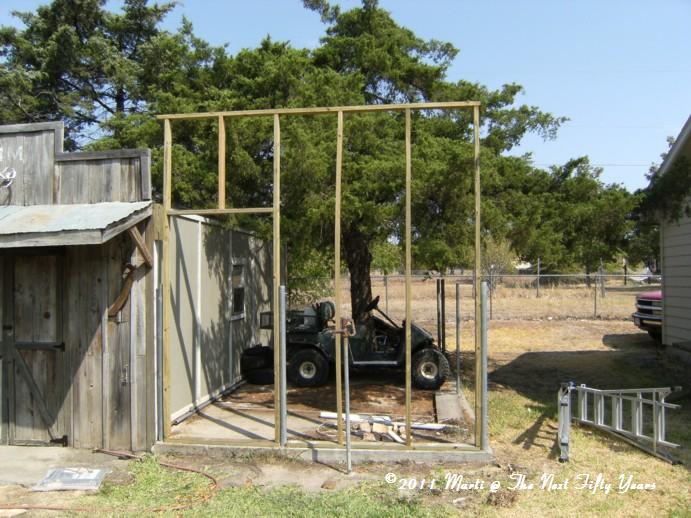
Before:

I'm sorry it's been awhile since I posted. I started this project earlier this summer, and after I finally got over shingles, I have been working on it and a couple of other projects non-stop. It's still not quite finished (I still have to put a name across the top) but close enough to finally show you.
I've showed you my shed before - strategically photographed and cropped to only show the front I covered with wood from my grandparent's turn of the century two-room cabin.
What I've never showed (or tried not to show) is what is beside the shed.
Think it doesn't look too bad? Look closer. To the right, a wire fenced area that used to be a dog run.

It doesn't look too bad like this, although I'd prefer not to see any of that stuff, which is overflow from the fenced area on the left side of the shed.

This fenced area has been a bone of contention for the last fifteen years since Hubby built it to hide his junk. Sometimes I think we are one rusting pile of junk away from being featured on an episode of The Hoarders. If Hubby ever stacked anything neatly in there, that ended at least ten years ago. Then it became a mosquito-breeding, snake-hiding, weed-growing trash pit and I refused to go in it.
One day I was wishing, as I often did, that the wood fence was on the right side of the shed so all the stuff was on concrete and hidden behind a fence, and it dawned on me that I could just do that myself. And instead of just rebuilding the same old fence, make it more interesting so it complemented the shed.
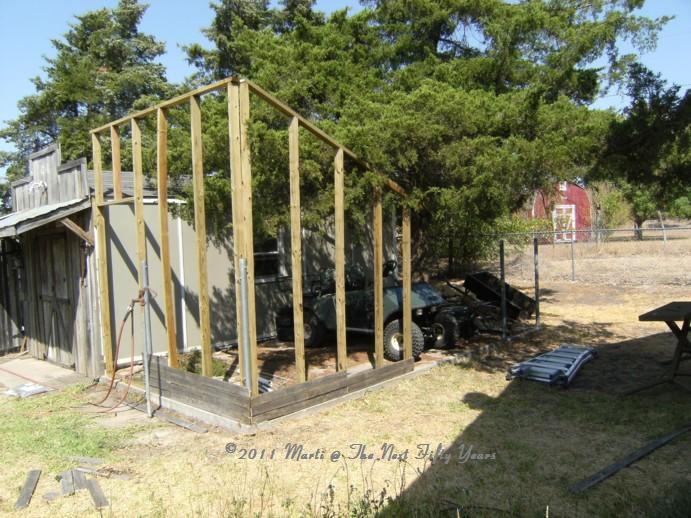
I patiently waited until Hubby went on a trip so he wasn't around to stop me. Then I took down the wire fencing, bought lumber to build a new fence frame, and bolted it to the old fence posts. (The center stud was straight when I bought it, and twisted more every day. Fun.)

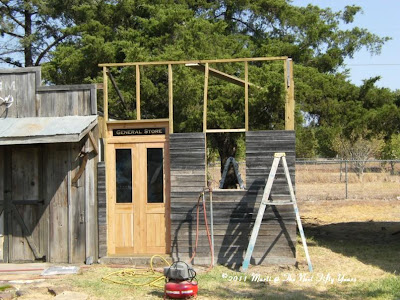
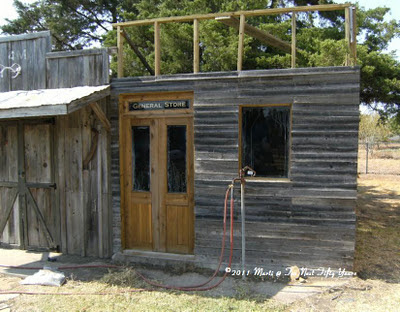
Then started building the walls by taking down pickets from the old fence, and laying them horizontally on the new fence.


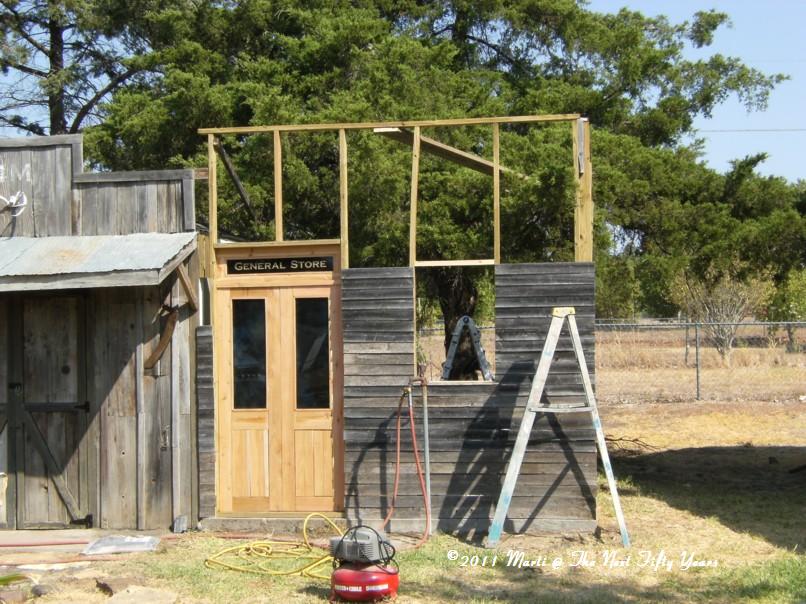
I stenciled "General Store" on the back of a piece of glass, and sprayed all the backs of glass with a variety of black and blue paints so it looked like a shadowy interior, even though there was a board behind the glass.

After I got all the glass in, I followed directions I found online to quickly age the new wood and sponged that on all the new rough cedar. What it did was shrink the new cedar, which cracked the window to smithereens. What it didn't do was age the new wood.
After I bought, painted, and replaced the glass, I didn't try the aging trick again.

And finished!
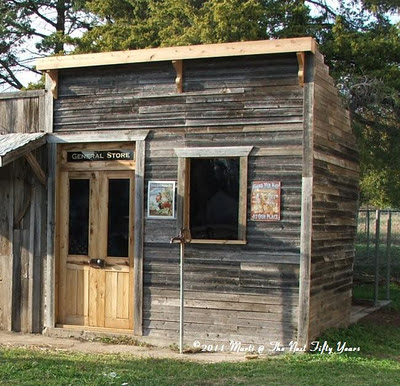
Junk, still hidden, but better.

Update! I got the name painted on it. Possum Trot was the original name of a nearby town until they decided to change it to something less, um, hillbilly.
Now. It's. Finished.

BTW, I added up my receipts for this project, and without tax, the total cost was $127.

I'm sharing this with My Repurposed Life - Catch as Catch Can, At The Picket Fence - Inspiration Friday, Tatertots and Jello


Before:


I'm sorry it's been awhile since I posted. I started this project earlier this summer, and after I finally got over shingles, I have been working on it and a couple of other projects non-stop. It's still not quite finished (I still have to put a name across the top) but close enough to finally show you.
I've showed you my shed before - strategically photographed and cropped to only show the front I covered with wood from my grandparent's turn of the century two-room cabin.
What I've never showed (or tried not to show) is what is beside the shed.
Think it doesn't look too bad? Look closer. To the right, a wire fenced area that used to be a dog run.

It doesn't look too bad like this, although I'd prefer not to see any of that stuff, which is overflow from the fenced area on the left side of the shed.

This fenced area has been a bone of contention for the last fifteen years since Hubby built it to hide his junk. Sometimes I think we are one rusting pile of junk away from being featured on an episode of The Hoarders. If Hubby ever stacked anything neatly in there, that ended at least ten years ago. Then it became a mosquito-breeding, snake-hiding, weed-growing trash pit and I refused to go in it.
One day I was wishing, as I often did, that the wood fence was on the right side of the shed so all the stuff was on concrete and hidden behind a fence, and it dawned on me that I could just do that myself. And instead of just rebuilding the same old fence, make it more interesting so it complemented the shed.
I patiently waited until Hubby went on a trip so he wasn't around to stop me. Then I took down the wire fencing, bought lumber to build a new fence frame, and bolted it to the old fence posts. (The center stud was straight when I bought it, and twisted more every day. Fun.)
Then started building the walls by taking down pickets from the old fence, and laying them horizontally on the new fence.

I stenciled "General Store" on the back of a piece of glass, and sprayed all the backs of glass with a variety of black and blue paints so it looked like a shadowy interior, even though there was a board behind the glass.

After I got all the glass in, I followed directions I found online to quickly age the new wood and sponged that on all the new rough cedar. What it did was shrink the new cedar, which cracked the window to smithereens. What it didn't do was age the new wood.

After I bought, painted, and replaced the glass, I didn't try the aging trick again.

And finished!

Junk, still hidden, but better.

Update! I got the name painted on it. Possum Trot was the original name of a nearby town until they decided to change it to something less, um, hillbilly.
Now. It's. Finished.


BTW, I added up my receipts for this project, and without tax, the total cost was $127.
I'm sharing this with My Repurposed Life - Catch as Catch Can, At The Picket Fence - Inspiration Friday, Tatertots and Jello