
  |
  |
Chalk board place cards:
  |
  |
After I finished the three planter boxes, I had a lot of scraps. I have a hard time throwing away scraps, which is how I had enough wood to make the planter boxes. But these were much smaller pieces, from six inches to about three feet. Just for fun, I wanted to see what I could make with the six inch pieces. Before making the planters, I searched the internet for ideas to use tongue and groove pine leftovers, and couldn't find a thing. Maybe this will help others searching for ideas.
I'm going to show you how to do this solely with a miter saw, or using a combination of table saw, miter saw, and router. I began with the miter saw because I really didn't have a plan when I started, just an idea, and this saw was easier to tweak the design. After I made, remade, and remade the first few, I knew how I could do it faster, easier, and with precise dimensions on the other saws. But it's possible to do it all on the miter saw if that's all you have.
By the way, these instructions are detailed for the beginning woodworker. Experienced woodworkers can glance at the photos and figure out what I did and how to do it better and easier, I'm sure.
Miter Saw Version
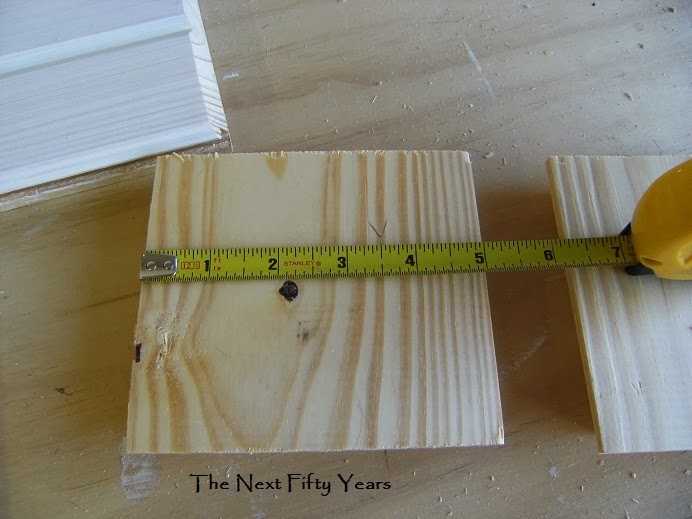
My boards are tongue and groove (T&G) pine, 5-1/8 inches wide plus the tongue (I'm not counting the tongue because I cut it off.)
To make a set of four place holders, you would need:
24" T&G pine, cut into 5-1/2 inch pieces
primer (I like BIN for this)
white or light eggshell paint
Mod Podge
4 sheets of decorated paper or fabric (I used paper napkins for the above)
clear dry erase paint or chalkboard paint
foam paint brush
medium grit sand paper
brayer
wood glue
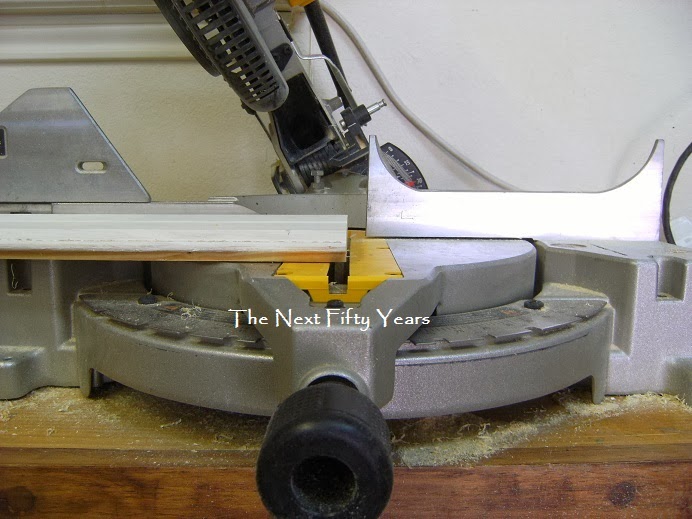 |
| Step 1: Make angle cuts on one side |
Step 1: Set miter saw at 30 degrees and cut one side of each board.
 |
| Step 2: Make angle cuts on other side |
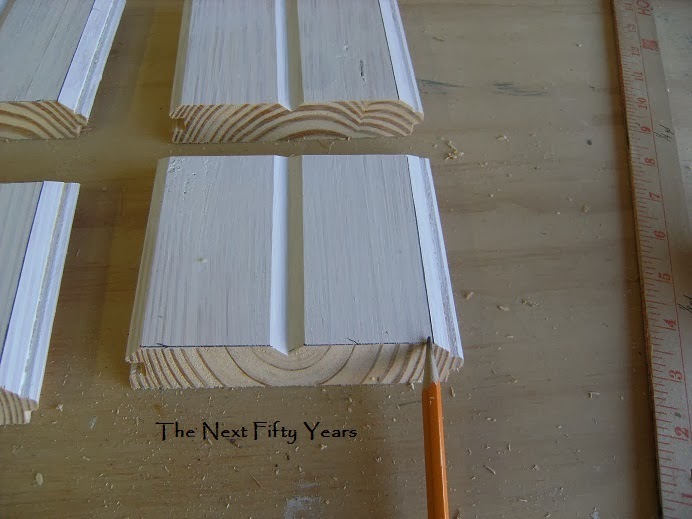 |
| Step 3: Make beveled cut on tongue side |
 |
| Step 4: Cut bevels on sides |

 |
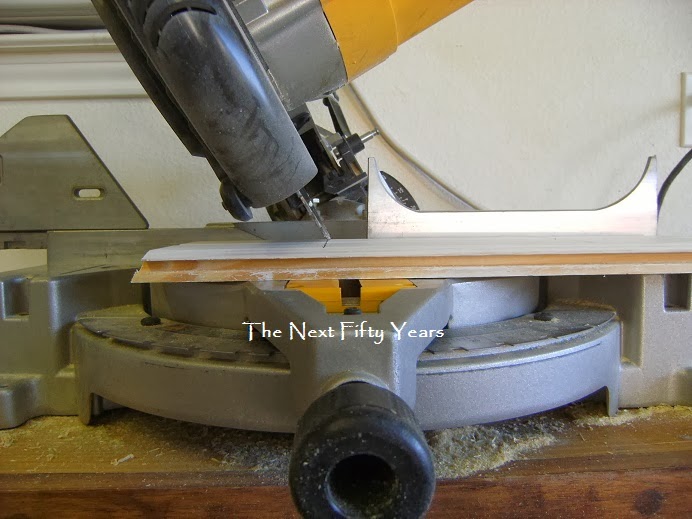
| Step 5: Cut bottom angle |
Step 5: Set the miter saw to 30 degrees again. Turn your boards over and measure 3-1/2 inches from the top. This cut will be opposite all the others which is why you are cutting from the back.

 |
| Step 6: Glue stand onto back |
 |
| Step 7: Prime all sides |
Step 7: Prime all sides. Do this whether you are going to use chalk paint or dry erase paint. I like BIN because it can be sanded very smooth and it dries quickly. After that, how you finish is up to you.
 |
 |

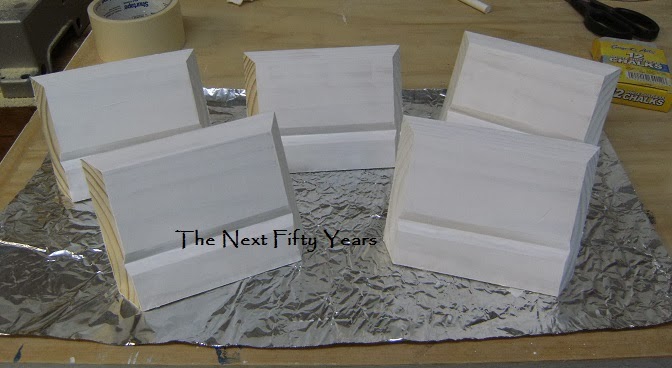
Step 8: Finishing. You can paint it all one color, or let your artistic skills loose. Originally, I wanted to do some op art designs on it, but didn't like the way I was doing it and how long it took. You can Mod Podge onto it, which is what I ended up doing. I thought it would be quick and easy. I was wrong, of course. I followed the basic Mod Podge instructions using paper napkins from Modge Podge Rocks.
The only tips I can give you on finishing is what NOT to do.
 |
| 1. Don't paint chalk paint before Mod Podge-ing. |
 |
| 2. Don't paint over stickers |
 |
| 4. Don't put stand on after Mod Podged paper |
Table Saw, Miter Box, and Router Version
If you are only going to make four place cards, setting up all these may not be worth it to you. As it was, I had a lot of scraps in the two to five foot range, so this greatly sped up the process and made each piece the same. I'm really unhappy with imperfection, so this was good for me.
 |
| Step 1: Set table saw at 5-1/8 inch |
 |
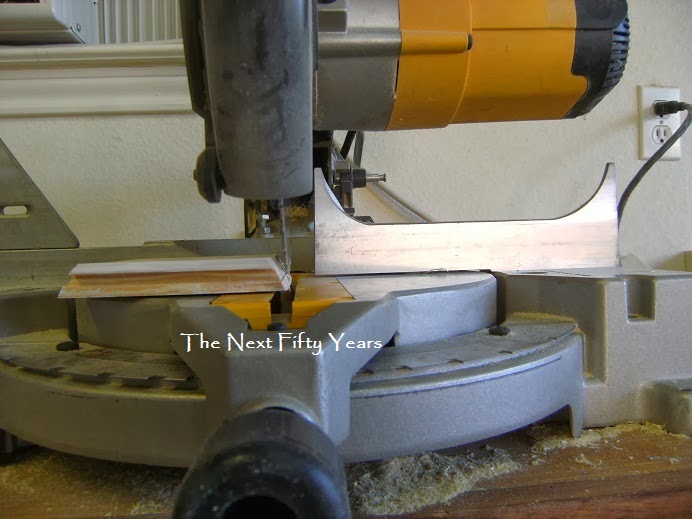
| Step 2: Clamp wood stop to miter saw |
Step 4: (This is basically as Step 5 above) Set the miter saw at 30 degree angle. Turn the piece over and measure 3-1/2 inches from the top. Clamp a block to the fence of the miter saw so it makes the right cut every time.
Frugal Friday at The Shabby Nest #263
Catch as Catch Can at My Repurposed Life #76
Made U Look at Made in a Day #178
Show and Tell Friday at My Romantic Home #263
Thrifty Things Friday at The Thrifty Groove #78
Fabulously Creative Friday at Jennifer Rizzo #119
Be Inspired at Common Ground #240
Home Sweet Home at The Charm of Home #121
Pin Me at Diana Rambles #187
That DIY Party at The DIY Showoff #104

You certainly know your way around a wood shop!
ReplyDeleteThank you but I still feel like a beginner, though I'm learning more all the time. I used to love helping my father-in-law in his shop, but we never had a good work area here until a few years ago. Hubby used the shed as his shop, but I refused to work out there.
DeleteThose are so cute - but not in my future! No mitre saws or routers in my garage! If I am lucky there might still be the Skill saw
ReplyDeleteLOL, I'd much rather use a table saw and miter saw than a skill saw.
DeleteBrilliant idea! Love them! xoxo Jen
ReplyDeleteThank you. I've really had a lot of fun making them.
ReplyDeleteOh my goodness, these are just too cute! You did such a great job making them. Thanks for sharing at TTF!
ReplyDeleteVery cute! I love that you shared the "what not to do" part. Most of my projects end up having a lot of those parts. It's nice to know that I'm not the only one that happens to.
ReplyDeleteThanks! I bet everyone has those parts when they do something the first time. I couldn't believe the planters went together with so few problems, other than me kicking over a jug of red colorant and splattering - but that's a story for another time.
DeleteI love the decoupage print you use and the sticker dots idea was awesome. I going to remember that for dots idea for my card-making. I love this idea so i going to pin it for others ...love it
ReplyDelete